Making pages and using widgets
By the end of the last tutorial, our site was up and we had made quite a few basic edits to the CSS to begin to customize the look of the site. I continued on to make some more edits and if you want to see my updated stylesheet, you can download one here.

What I want to do next is start adding some more functionality to the site through pages (for more information about the Blank) and some widgets in the sidebar.
Adding pages
Creating new pages for you site is super easy. I want to add in a few new pages to cover the following sections: about, about the creator, the production schedule and contact information. We can do this with a couple of quick steps. If you don’t have information written up for each of the pages, you can always save a draft that you can publish later. For the purposes of this tutorial, I’m going to be using Lorem Ipsum for my content. I’ve deleted the Sample Page that Wordpress automatically generates when you set up your site since I won’t need it anymore.
So now that we’re ready, let’s make some pages.
1.
The first page that we’ll create is the About page. To start, click Pages on the left-hand side of the page and this takes you to the overview of the pages that you have on your site. Create a new page by clicking on Add New either at the top of the page (beside the Pages title) or on the left-hand side of the page (below Pages).
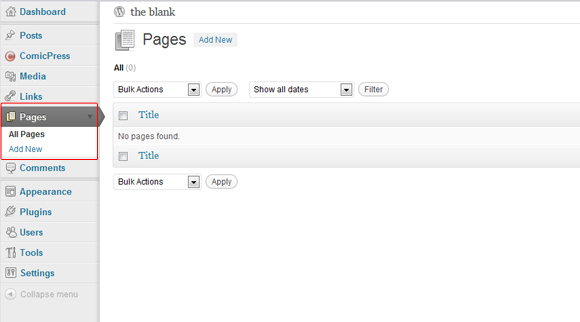
This will take you to a new page where you can fill in the information that you want to appear. Add in a title and the written content in the fields provided.
Next you need to define the page Template you’d like to use (in this case I’ve selected Default since I just want a normal page) and next select the Order you want it to appear in the menu bar (the default is 0 which will come first, I’ve set mine to 1).
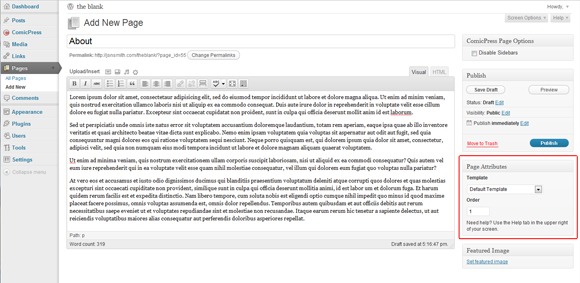
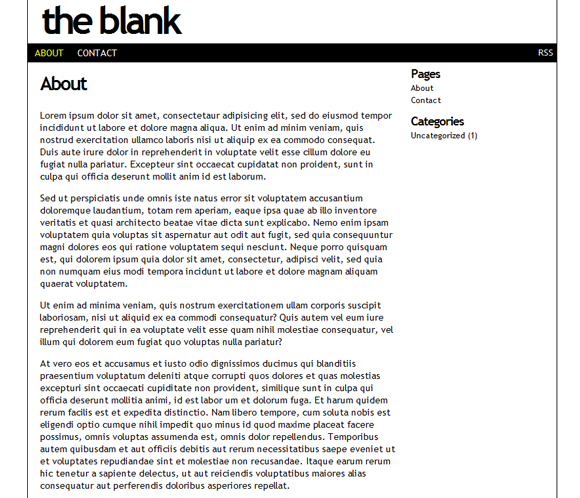
At this point, my page is ready to go so I’ll click Publish and the page goes live on my site. Now the handy thing about ComicPress is that it automatically adds in the new page to my navigation menu bar on the site instead of making us have to add it to the code manually. Go ahead and create a Contact page using the same process (set the Order to 2 to place it after About in the navigation menu bar).
2.
I’ve decided that I want the “about the creator” page to appear under the About page in the navigation. To do this, we have one more step than last time. First create a new page like before and fill in the information.
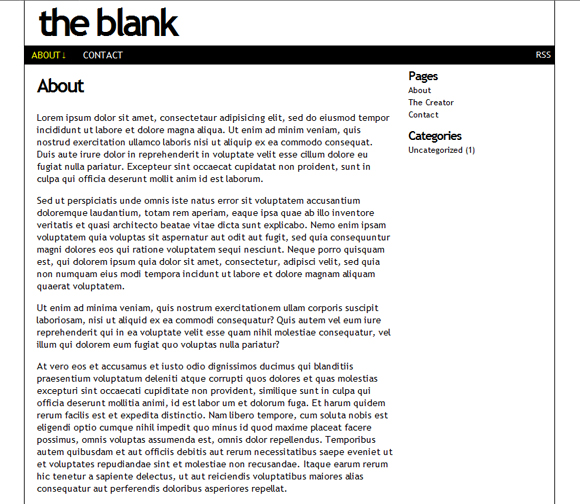
Next set the Order to 1 and the Template to Default (like in Step 1). And finally we need to set the Parent by selecting About from the drop down menu. When you publish the page and look at the website in a browser, you’ll notice that About now has an arrow beside it indicating that there is a menu item below it (in the drop down).
Now create a Production Schedule page using the same process (and remember to set the Order to 2).
3.
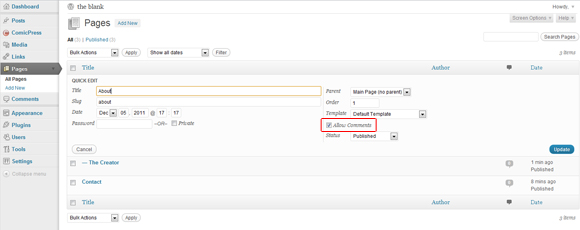
Now that I’ve created all my pages and looked them over in the browser, I’ve decided that I really don’t like the look of the comments at the end of the pages and I don’t want people adding comments to these pages anyway. So to take them off, click Pages on the left-hand side of the page and then select Quick Edit under About (hover over the About page and it will appear below). This opens up several data fields that allow you to quickly make changes to the page. In the second column there is a check-box titled Allow Comments (see the image below for reference) that defaults to “on” whenever you create a new page. Un-check the box and click Update to save the change. If you switch to your browser and refresh, the comments are gone. Go through the same process for each page to take off the comments.
Widgets
Wordpress defines widgets as “plugins that add visitor visual and interactivity options and features…Widgets require no code experience or expertise. They can be added, removed and rearranged on the Wordpress Administration Appearance > Widgets panel.” ComicPress comes bundled with its own 20 “useful” widgets that can be placed on “13 Widgetized areas in the layout.”
For the Blank website, I’m going to only use widgets in the sidebar at this point to keep things simple. Let’s take a look at what widgets we can add to our site by clicking on Appearance on the left-hand side and then clicking Widgets to take us to the Widgets page.
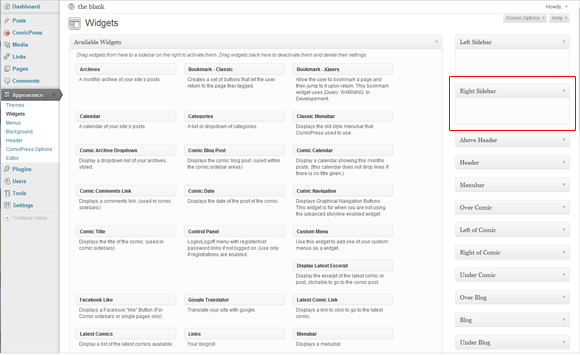
Under Right Sidebar (which is the second one down) I’m going to add widgets by dragging them from the main area on the left to the Right Sidebar area. Here’s what I used:
Latest Comics – This widget is one of the widgets that comes bundled with ComicPress and is incredibly useful. Basically, the widget will generate a thumbnail of the latest page that’s been published and display it in the thumbnail with a link to the actual page.
Archives – This is a really good idea if you’re blogging a lot (which I intend to do). It will display months for when you posted. I’ve checked the “post count” box so that people can see how many posts are in each month.
Categories – Also a good idea if you’re blogging a lot. We’ll cover categories in a later post, but this widget displays all of the categories that you’ve generated and this will help the user find what they’re looking for easily.
There are a ton of other widgets that you can add in. Just figure out what you want and drag and drop it into the sidebar.
The Text/HTML Widget
The widget that I find the most useful when designing websites is the Text/HTML widget which allows me to put virtually anything I want in the sidebar – completely customized. Want a button advertising your Twitter profile? Use this widget. Need to promote a contest you’re participating in? Use this widget. Do you want to feature advertising on your site? Use this widget.
I want to put links to highlight my Facebook and Twitter stuff for the comic, so this widget is the perfect solution. Here are the steps that I followed to do this:
1.
I created the artwork for the buttons and saved them for the web. If you don’t know the width of your sidebar, it’s 200 pixels wide with 5 pixels of padding around it. This means we should build our button to 190 pixels wide (200px – 5px – 5px = 190px). Build them to whatever height you want (I made mine 50 pixels high).
2.
Upload the images to your website by clicking Media on the left-hand side, then Add New. From here, click the button Select Files and upload the buttons. Each button will have a File URL that I copied and pasted into an outside text document that I’ll use in a minute (this URL is where the image is located on your server).
3.
In an outside text editor (or Adobe Dreamweaver) I then wrote the following code for the button:
(A) The <a> tag surrounds the image telling the browser that this is a link.
(B) The href sets where the link should point (i.e. where is the link going) and the target=”_blank” tells the browser to open the link in a new window.
(C) The img src tells the browser where to find the image that we created (this would be the File URL that we copied in the previous step).
(D) The width and height can be set to the width and height of the image that we created.
(E) The alt is the alternate text that will appear if there is a problem loading the image or if the user hovers their mouse over the image.
4.
For the final bit of the process, go back to the Widgets page (click Appearance on the left-hand side and then click Widgets) and drag and drop the Text widget to our Right Sidebar. Then copy the code from Step 3 into the widget and click Save.
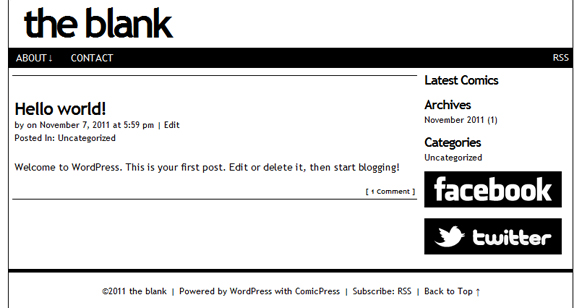
If you go back to view the website in a browser window the image (with the necessary link) will now be in the sidebar. Repeat the process to create the Twitter button. The new buttons should look like this:
Final thoughts
Pages and widgets should give you a lot of options for how to enhance your site and add in usability for the reader so take what we’ve covered here and be creative. In the next post we’ll take a look at more ways to add functionality to your website.
______________
For the rest of the series click one of the links below:
makingcomics.com