Basic edits
We ended the last post with WordPress and ComicPress installed and our child theme created. We’re now ready to start customizing our site so that it looks like we want it to. This post is still what I’d classify as a beginner level and we’re going to be customizing the layout, type and colors. Let’s get started.
1.
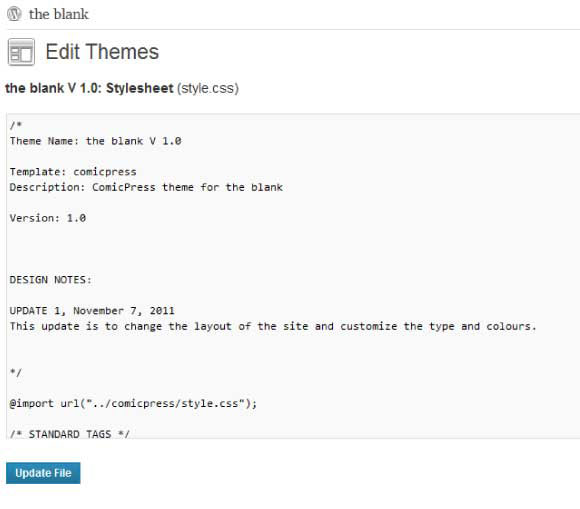
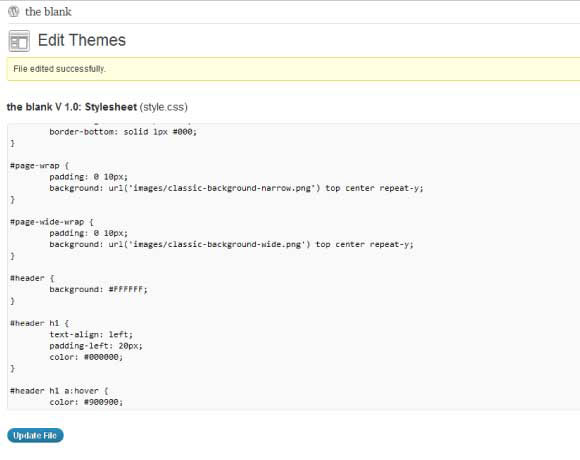
To begin, a quick note about how I usually work when editing the code. I always try to add comments and notes to the code as I work, so that if (and when) I go back to make further edits, I can remember exactly what I’ve done. So for the first step of this process, I’m going to add in a note at the top of the stylesheet (style.css) that summarizes what the edits I’m going to make will cover. Below is a screenshot of my notes (notice that all the notes are started by /* and ended by */). This is a basic CSS code tool called a comment mark. Anything in between the /* */ will be ignored by the system when it displays your webpage. I use these notes throughout the stylesheet to remind myself exactly what each piece of code does. When I started working with ComicPress it was pretty confusing and this process has allowed me to figure out what’s going on in the stylesheet and code.
2.
Next I want to adjust the layout so that it’s simpler than the 3-column that is the standard ComicPress layout when you install everything. To do this, click on Appearance on the left-hand side of the Dashboard and once the page loads, click ComicPress Options and this will automatically take you to the Layout page.
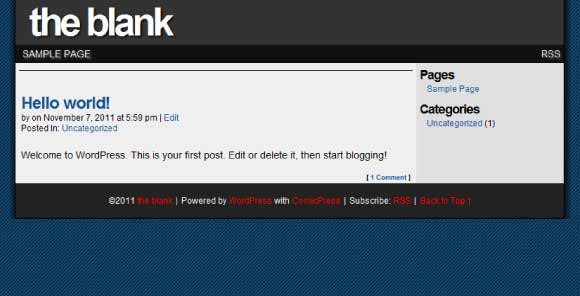
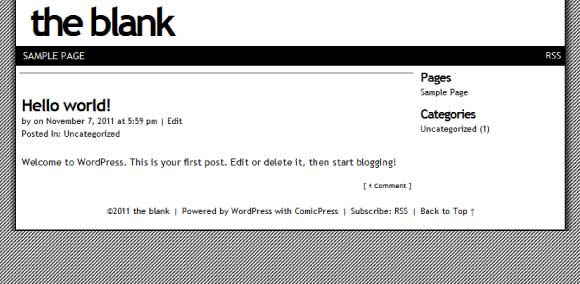
In the middle of the page is a dropdown that will let you select what layout you prefer to use. You can definitely play around with layouts and see what works for you, but for this tutorial we’ll choose the very first one in the list: “2 Column – Sidebar on Right”. This is a pretty standard format and it will work for what I want the Blank website to look like. Click Save Layout and if you view the website in a browser it should look like below.
Customizing your site – colors
Since we’re about to begin editing the code in the site, it’s probably a good time to point out that this is where you’ll need to know some basic HTML/CSS/web stuff. If you’re not that familiar, you can download my stylesheet in a link at the end of this tutorial so that you can follow along. We’re going to edit the colors then the type, so let’s get started.
1.
The first thing that I want to change is the background colors used in the site (defined asbackground-color in the stylesheet). My plan is to keep things simple and use white, black and red for the color scheme (I’m going to use simple web safe colors to keep things simple and if you want to choose different ones for your site, try out the w3schools link here for more options).
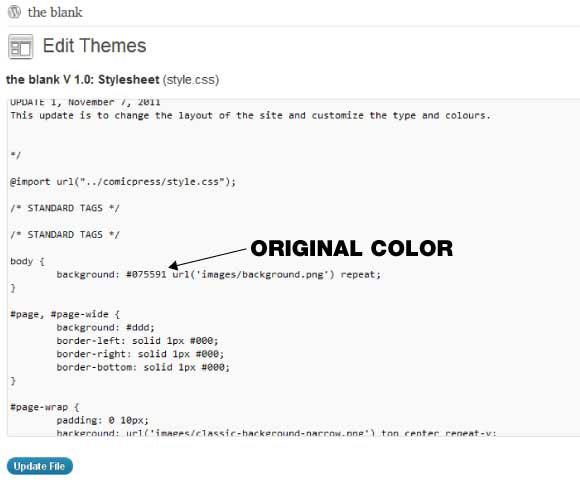
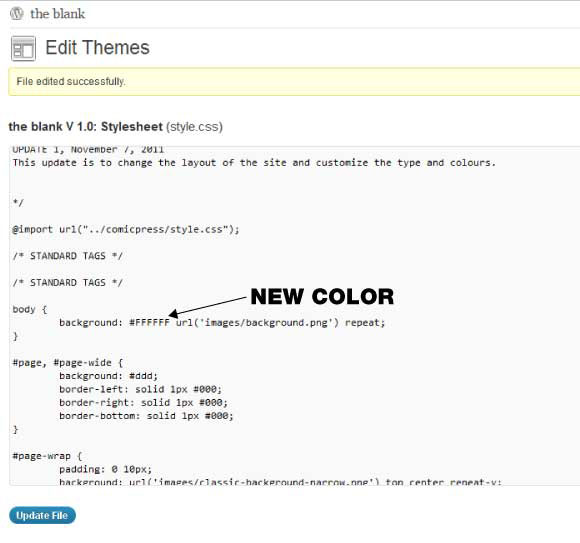
For the design I have in mind, the backgrounds should be white and to do this I need to edit the colors that are defined in the stylesheet. I need to change the color defined in the bodyelement from blue (shown below as Original Color below) to white. However, since this is a programming language, I need to use a special code to do this: the hexadecimal notation (HEX triplet). Hexadecimal codes can get very involved, but for our purposes, know that it’s just another way of defining the way a computer displays colors, in a way readable by your website. Looking at the list of web safe colors I linked to (above), I see that I need to alter the HEX triplet for background from #075591 to #FFFFFF (shown below as New Color).
Take a look in the browser window and the background of the site should be white.
2.
Now we need to go through the whole stylesheet and update the colors as we go to make the backgrounds of each element white. Here’s what I updated and the order I did them in:page, header, content-wrapper, footer, narrowcolumn/widecolumn. After each one, I simply clicked Update to save the change and then refreshed the website in the browser window so that I could see what the overall change looked like. If the change didn’t look like I wanted, I simply went back to the original color and I was back where I started. Now that all of the background colors are white, the site looks like this:
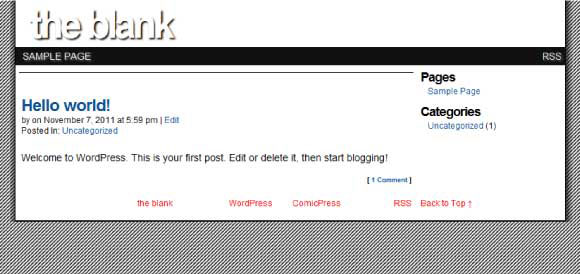
I’m still not sure about the background lines and some of the other design, but I think this will do for now. We can always come back later and make more edits if we want to.
Customizing your site – type
Now that the colors have been changed, we can’t read the type that was white. Not to worry though, since we’re about the adjust the type in this step. Typography on the web has changed a lot in the past couple of years or so but for this beginner level tutorial we’re going to keep things simple. The first thing that I want to do is alter which font the site uses. There are a bunch of fonts that work online that you can choose from when you’re just starting out and if you’re curious I’d suggest you check out what’s listed on the w3schools link here. Let’s fix the type.
1.
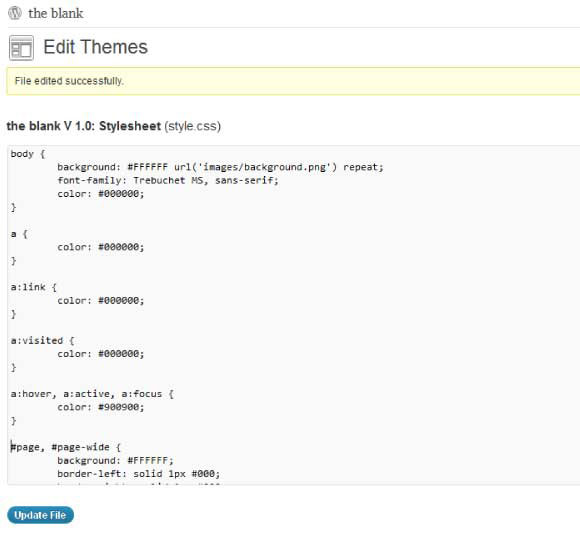
The first thing to take care of is defining the type the site should use. For this site I’ve decided to use Trebuchet MS because it’s a sans serif and I never use it for websites. To adjust the type that’s used, simply add in the following code to the body element:

So in (A) we have defined the font as being Trebuchet MS as well as told the browser to use a default sans-serif typeface if Trebuchet MS isn’t loaded on the user’s computer (this is part of making good code and having your site “degrade gracefully”). And in (B) we have defined the color of the type as being black by setting the HEX triplet to #000000. If you refresh this in your browser, you might not notice a huge difference but if you look at the g’s (say in the word Category) you’ll see the change.
2.
Now we need to change the color of the rest of the type used throughout the site so that all of the headlines, header and footer elements are black. To do this I’m going to go through the stylesheet in the exact same way that I did when I changed the background colors above – updating and refreshing the browser as I go to see that the changes are made correctly. Here’s the order I did the edits in: header h1, footer, header h1 a, footer a.
3.
I want the links to change color to all black too (instead of the default blue), so I’ll need to add in some copy at the very top of the stylesheet after the body element to make sure that they do this. The reason we need to add in the code ourselves is that the child theme is currently using the ComicPress code that defines what links look like. The ComicPress Boxed theme we used as the basis for our site didn’t define these, so we need to do it in order to change the appearance of the links (This is another reason why creating a child theme was so important before we started making edits since we can add and change things in our stylesheet and not worry about changing the core code).
So add in the code below and your links should now be black. When you roll over them they’ll change to red (HEX #900900).
4.
You may notice that when you scroll over the footer links they turn white. This is happening because there are footer links defined in the stylesheet. To fix this altogether, find thefooter a and footer a:hover in the stylesheet and delete them. When you update to save the edit and refresh the browser, the footer links now work perfectly.
5.
The final edits for this post are going to be to the navigation bar. Right now, when you scroll over the link that’s there it turns yellow and the RSS link turns orange. I want these to be the same red as the rest of the links of the site.
Here’s the catch with these edits: none of the code exists in the stylesheet that we’re working with again. All the base code is in the original ComicPress stylesheet. So to make the edits, I’ll be the guide and follow along with these steps.
I want to set the background color of the menubar to black to match the design so far. To make these edits, locate the /* MENU */ in the stylesheet and add in the copy below:
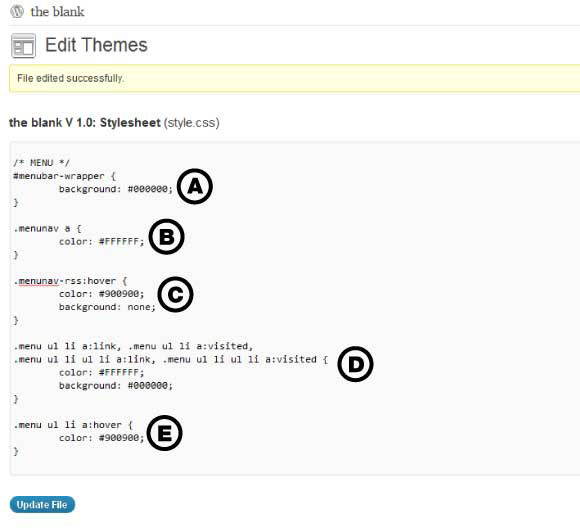
(A) We’ve now defined that the menubar-wrapper should be black (HEX #000000). Next we want to edit the links.
(B) We set the link color in the .menunav a to be white text.
(C) The .menunav-rss:hover needs to be changed so that the active link goes red and to get rid of the background-color in the original stylesheet, we define the background as “none”
(D) For all of the .menu ul li links we do much like above and define the type colour (white) and set the background-color to black by adding in #000000 definition. We need to set the background color to black so that if there’s a sub-menu item the drop down navigation will show with a black background.
(E) All that’s left is to set the .menu ul li a:hover to be red to match the rest of the site.
6.
There’s one more final bit that’s really annoying me. So before we end this session, let’s make one last update. There’s a drop shadow on the title at the top of the page and I want to get rid of that and add in an active link state. To do this I deleted the h1 definition under the /* MENU */ section and added in a header h1 a:hover definition up with the #header h1. My final bits of edits look like this:
Keep experimenting
So that’s it for this tutorial. I’d encourage you to play around with the colours and find something that works for you. If you want to see my full set of edits to help you follow along, you can download my stylesheet here and I’ve added in comments to help you see what edits I’ve made. Otherwise, keep trying out making edits to the site to get it to look exactly like you want it to. For now, here’s what the site looks like:
Next we can cover adding in some more function to our site through pages and widgets.
_____________________________________________
You can see more of Jason Smith’s work at jsnsmith.com/ontheverge
makingcomics.com